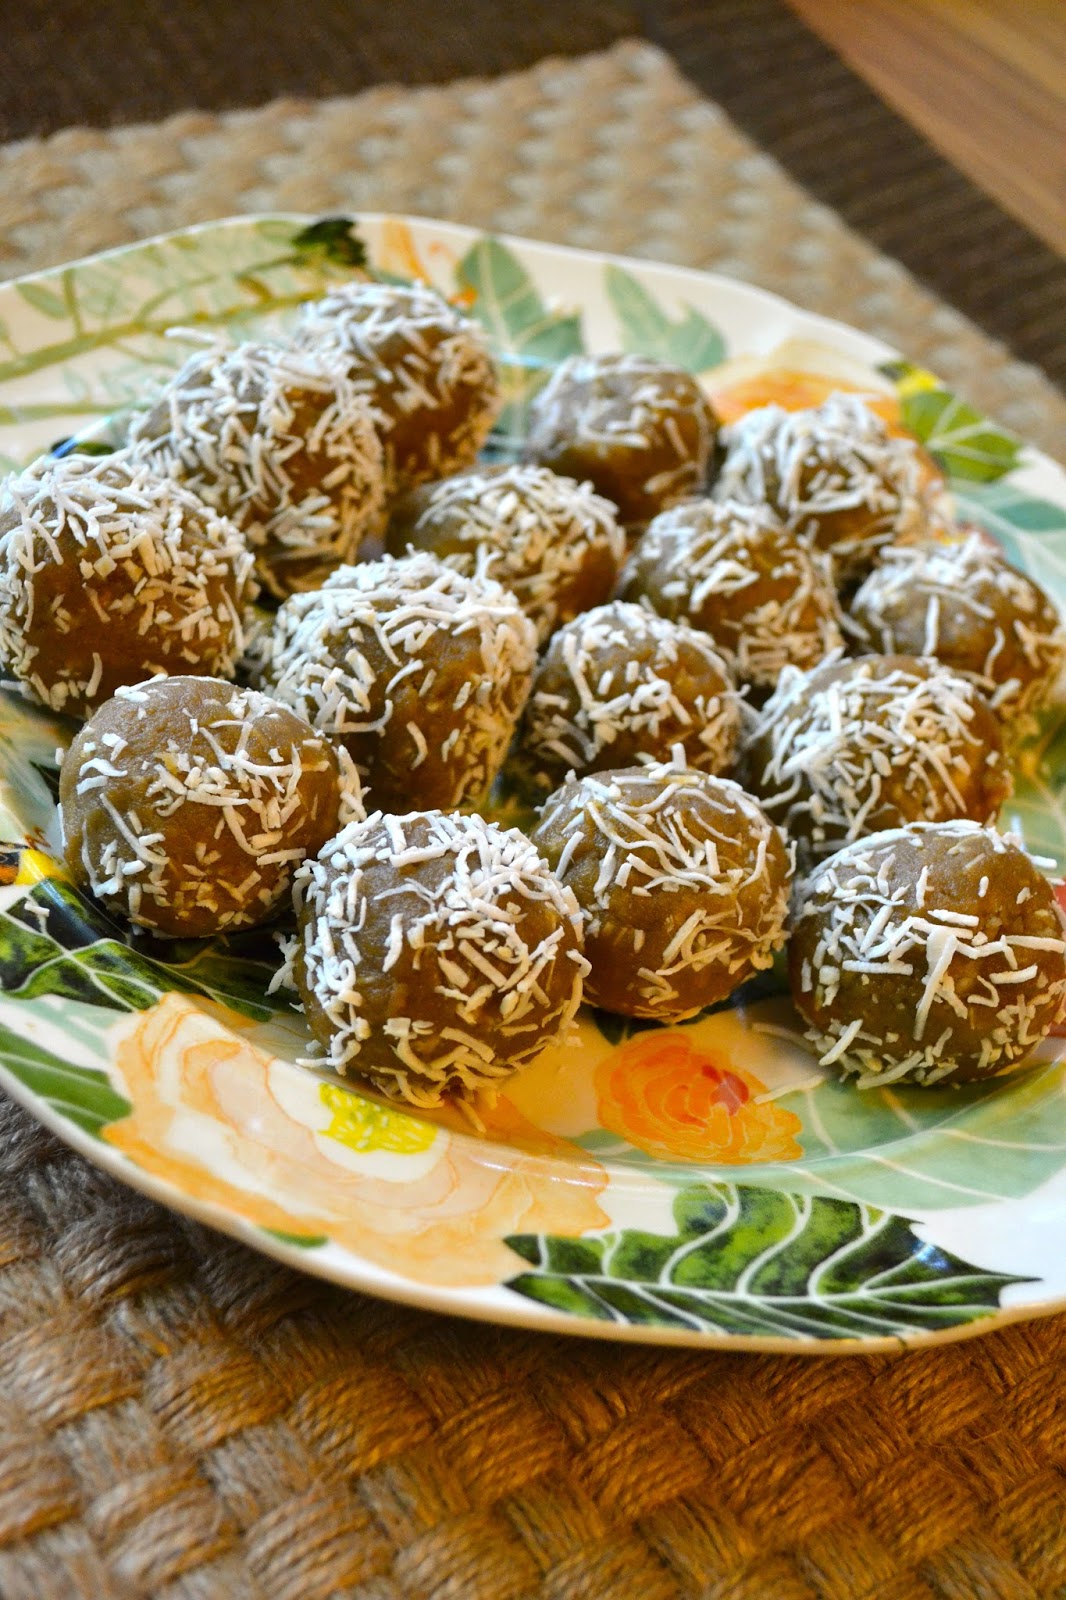
By popular demand, I introduce to you the Coconut No-Bake Ball. It's edible, it's memorable, and it's just enough sweetness to hit the spot. Not to mention, it is packed full of much-desired lauric acid! Most of you know my healthy obsession with coconut oil because of all its anti-viral and anti-bacterial properties, so eating one of these coconut balls is kind of like getting a mini flu shot, but much much more enjoyable.
My husband is allergic to nuts, so instead of using almond butter we use sun butter, made from sunflower seeds. You can hardly tell the difference between peanut butter and sun butter, so it's a great substitute when recipes call for any kind of nut butter.
Makes 18, 1-inch balls
4 tablespoons melted coconut oil (raw and unrefined coconut oil)
4 tablespoons coconut milk
1 cup almond butter (or sun butter for nut allergies)
1/2 cup coconut flour
1/2 cup + 5 tablespoons unsweetened shredded coconut
2 tablespoons xylitol (or stevia if you prefer)
Add all ingredients except the 5 tablespoons shredded coconut to a turbo blender. Make sure to add the ingredients in the order listed above. The mixture will get pretty thick very fast, so you want your liquids at the bottom of the blender. Blend mixture and then pause to push sides of the mixture down with a spatula. Blend again if necessary. The mixture is going to be thick like cookie dough, so be prepared to keep an eye on your blender so the motor doesn't burn out. The mixture should be thoroughly blended, but not smooth.
Now roll dough into 1-inch balls and roll each ball in the reserved shredded coconut. Place coconut balls on a plate and refrigerate for at least 30 minutes before eating. Enjoy!
This recipe just so happens to be part of a candida cleanse, which I found on the Candida Diet website. Candida is a form of yeast found naturally in the intestine and the mouth. When you have an overgrowth of candida, it can make you get frequent colds and flus, feel lethargic or irritable, have chronic body pain, unable to focus, crave sugar or alcohol, unable to lose weight, and experience digestive problems. An overgrowth can happen with a slight change in your body, like going through a few rounds of antibiotics, eating a diet rich in carbs and sugars, or experiencing high stress. The Candida Diet website gives great background on what candida is, how an overgrowth effects your body, how to know if you have an overgrowth, and how to get rid of it.
You are meant to feel good! Listen to your body and do what it takes to get back to your natural state—health. There are so many resources out there to help you along the way!
Saturday, September 14, 2013
Friday, September 13, 2013
One Reason Not to Go Raw
Click on the images for a closer look. Are you surprised? It looks like if you're wanting more vitamin C, go for the raw kale, but if you're looking for an even more gargantuan amount of vitamin A, go for the cooked version.
What really caught my eye was the "Inflammatory Factor" numbers. Kale is already a highly anti-inflammatory green, but look at how that factor almost doubles when cooked. I had no idea! The lesson we learn, as always? Eat more kale. Eat more greens!
Just in case you're wondering why this information matters, stress causes inflammation and a whole lot of the foods we eat cause inflammation. People who deal with chronic or acute pain issues would do themselves good to eat more foods that are anti-inflammatory. I am always looking for ways to decrease the inflammation in my joints, so discovering this little secret about kale is huge. This morning, before I even made this discovery, I had some scrambled eggs cooked with garlic, bell pepper, and kale. Guess I'll be keeping that up and creating all kinds of new concoctions with cooked kale.
Go to Self Nutrition Data and type in chard and spinach (or any other food) to check out their nutrition facts and inflammatory factor.
(Out of curiosity I just looked up dandelion greens too. Same pattern of the nutrients skyrocketing when cooked. I'm going to have to look into this some more. Any insights? What is it that increases the anti-inflammatory property in greens when they are cooked? Time for me to do some research.)
Friday, August 2, 2013
Horchata Rice Pudding
I found this recipe in Veg News magazine and then slightly tweaked it to make it my own. It's great warm or chilled. Promise to share!
serves 6
3 cups rice milk
2 cups coconut milk
1 cup Arborio rice
1/2 cup brown rice syrup
1 teaspoon vanilla
1 teaspoon ground cinnamon
1/2 teaspoon freshly grated cardamom
6 tablespoons raisins, toasted unsweetened coconut chips, for garnish (optional)
1. In a large saucepan over high heat, combine rice milk, coconut milk, rice, and syrup, and bring to a boil. Reduce heat to low and simmer, stirring occasionally for 30 to 40 minutes, or until rice is soft and mixture has a thick, pudding-like consistency.
2. Stir in vanilla, cinnamon, and cardamom. Remove from heat. Serve warm or cold, topped with raisins or coconut chips. (I prefer it without toppings.)
serves 6
3 cups rice milk
2 cups coconut milk
1 cup Arborio rice
1/2 cup brown rice syrup
1 teaspoon vanilla
1 teaspoon ground cinnamon
1/2 teaspoon freshly grated cardamom
6 tablespoons raisins, toasted unsweetened coconut chips, for garnish (optional)
1. In a large saucepan over high heat, combine rice milk, coconut milk, rice, and syrup, and bring to a boil. Reduce heat to low and simmer, stirring occasionally for 30 to 40 minutes, or until rice is soft and mixture has a thick, pudding-like consistency.
2. Stir in vanilla, cinnamon, and cardamom. Remove from heat. Serve warm or cold, topped with raisins or coconut chips. (I prefer it without toppings.)
Homemade Italian Seasoning
This blend is some marvelous stuff. We toss it in salsa, stir it into veggies, sprinkle it into pasta salad, and add it to marinara. You're going to love having a stash of this in your cupboard or pantry. It's a great go-to seasoning to replace any prepackaged Italian seasonings that may have unwanted fillers.
1 tablespoon garlic salt
1 tablespoon onion powder
2 tablespoon oregano
1 teaspoon black pepper
1/4 teaspoon thyme
1 teaspoon basil
1 tablespoon parsley
1/4 teaspoon celery salt
2 tablespoons sea salt
I found I was going through this amount really fast, so I like to double this recipe.
1 tablespoon garlic salt
1 tablespoon onion powder
2 tablespoon oregano
1 teaspoon black pepper
1/4 teaspoon thyme
1 teaspoon basil
1 tablespoon parsley
1/4 teaspoon celery salt
2 tablespoons sea salt
I found I was going through this amount really fast, so I like to double this recipe.
Wednesday, June 26, 2013
Healing the Body, Mind, & Spirit w/ LIGHT: A Talk
Almost 2 years ago a good friend and past roommate of mine, Kaylynn, invited me to go hiking. Her bishop (similar to a pastor), loved the outdoors and every weekend would organize a hike for the members of their congregation. The hike was beautiful, and even though I didn't meet any new dating prospects (no guys even showed!), I connected with new friends to the point that this wonderful bishop wanted to hear more about my experiences of healing from rheumatoid arthritis—he felt like I had something his congregation needed.
So a few weeks later my friend and I went to lunch with the bishop, and he asked me question after question about my health journey that had turned into a profound spiritual journey. After I told him the details of how I came to know how to heal my body, he asked me to be a guest speaker during the main church service for his congregation. I was floored! I was overjoyed! But I was most of all humbly grateful—it humbled me to the core. After learning so much, all I wanted to do was be able to share that knowledge and those experiences to help other people, and here the opportunity came so easily! I accepted without hesitation.
Now, I've had this blog entry and audio recording prepped and ready for almost 2 years. I've been waiting for the right time to share because it is deeply personal, and especially personal because it was recorded in a holy space. Because I care about you all as my friends, I know that you will respect this part of me as I appreciate and even rejoice in your unique traits. All of you teach me so much! When we come together we can all learn and grow in ways we never could alone. (And before I go any further, we have my sweet grandma to thank for this recording . . . she couldn't be there, so she asked that we record it for her. My mom did come to support me, which meant the world to me, and a surprisingly familiar face was coincidentally in the audience too!—my dear friend Amber. She and I both know it wasn't a coincidence.)
I know that regardless of your religious background you can glean something from this talk that will speak to your heart and be just what you needed to hear. You'll notice that when I mention God, I call him Heavenly Father—for you this can be your personal Higher Source. I also talk about the Spirit, which I believe inspires and prompts and fills us with peace and joy. You may have felt this delicious feeling before and call it something else. I talk a lot about the Light of Christ, which is what breathes life into all living things. This can be compared to chi, or the life force. As you listen, apply the words and what you feel directly to your needs and your desires.
Most importantly I want you to know that there is untapped greatness inside you. I KNOW that God wants you to discover your highest potential and live it wholeheartedly! And I know that most of us are living far below our potential. Please listen to this talk and let it inspire you to not settle for the side of the trail but continue upward to the untold beauties at the top of the mountain, as I share in this recording.
Click here to go to SoundCloud to hear the audio.
You each have much to teach me, too, so please share your comments and let's get an enlightening discussion going.
Friday, April 19, 2013
Vegetable Laksa
May this curry find its way into your happy little heart . . . and belly. It is definitely one of our new favorites! Will and I didn't quite bond with the rice noodles like we'd hoped (as seen in this photo), but we loved the Vegetable Laksa over brown rice. The next time I make this recipe my plan is to either use Singapore rice noodles, which are much thinner than these Pad Thai rice noodles, or cook the rice noodles longer so that they're softer—they were too stiff to enjoy in the same bite with the veggies and curry.
3/4 pound (350 grams) rice noodles, Singapore noodles, or brown rice, cooked according to package
2 tablespoons coconut oil
5 tablespoons Thai Kitchen Red Curry Paste
1 (14.5 oz.) can vegetable broth
3/4 cup carrots, sliced into batons
1 can coconut milk
1/2 cup red bell pepper, sliced into strips
3/4 cup small zucchini, sliced into batons
1/4 cup soy sauce or tamari*
Cilantro, chopped
1. Place coconut oil in frying pan and add curry. Stir fry for 2 minutes.
2. Add vegetable broth and carrots, and bring to a boil. Cover and let cook for 1minute.
3. Add coconut milk, zucchini, and red bell pepper, and cook until tender.
4. Remove from heat. Add soy sauce and cilantro.
5. Pour over noodles or rice and serve.
*If you are making this recipe gluten free, make sure you use gluten-free soy sauce.
3/4 pound (350 grams) rice noodles, Singapore noodles, or brown rice, cooked according to package
2 tablespoons coconut oil
5 tablespoons Thai Kitchen Red Curry Paste
1 (14.5 oz.) can vegetable broth
3/4 cup carrots, sliced into batons
1 can coconut milk
1/2 cup red bell pepper, sliced into strips
3/4 cup small zucchini, sliced into batons
1/4 cup soy sauce or tamari*
Cilantro, chopped
1. Place coconut oil in frying pan and add curry. Stir fry for 2 minutes.
2. Add vegetable broth and carrots, and bring to a boil. Cover and let cook for 1minute.
3. Add coconut milk, zucchini, and red bell pepper, and cook until tender.
4. Remove from heat. Add soy sauce and cilantro.
5. Pour over noodles or rice and serve.
*If you are making this recipe gluten free, make sure you use gluten-free soy sauce.
Wednesday, April 17, 2013
Honey Cornbread Muffins (and, yes, they are gluten free!)
Makes 18 muffins
1 cup yellow cornmeal
1 cup brown rice flour
1 tablespoon baking powder
1/2 cup unrefined cane sugar
1 teaspoon sea salt
1 cup coconut milk
2 medium eggs
3 tablespoons unsweetened apple sauce
1/4 cup coconut oil, melted
1/4 cup raw honey*
1. Preheat oven to 400 degrees.
2. In a large bowl mix together cornmeal, flour, baking powder, sugar, and salt.
3. In a separate large bowl mix together milk, eggs, apple sauce, coconut oil, and honey.
4. Gradually add the dry mixture to the wet mixture, stirring to combine.
5. Place paper muffin liners in muffin tins and divide the muffin batter evenly.
6. Bake 15 minutes or until golden.
*Suggestion: If you love spreading honey over your cornbread or you know your family will still want to put honey on top of these muffins, consider eliminating the honey from the batter or at least lessening it. The muffins are sweet and delicious without needing honey spread over top.
Tuesday, April 2, 2013
Snoring Has Finally Met Its Match: Thyme
If you could choose between sleeping peacefully through the night or waking up every few hours and not being able to fall back asleep, which would you choose? It's pretty safe to say that most, if not all, of us treasure our sleep enough that we would do anything to get a good night's rest. Anything!
According to a study at the University of North Carolina, 30 percent of women and 40 percent of men snore, although those numbers depend on the person surveyed actually being aware that they snore. This study is to test how making lesions on the soft palate by heating a needle electrode with radio frequency energy can tighten up the soft palate to potentially eliminate snoring. I'm telling you this to illustrate how we as a society are going to great lengths to find ways to get rid of snoring—it disrupts our sleep and the sleep of the people around us.
This Friday Will and I are going on three months being married! We are so in love (I just had to throw that in there) and have so much fun together. Who knew it'd be worth the wait to find a love that would happen so naturally and easily (compared to ALL the other attempts of trying to force love and "make it work") and find the person who would make us truly the happiest? I am so grateful for this man.
Well when we were dating I found out that Will snored. And not just snored but raised the roof with his snores and woke neighboring cities. His friends and family know this from personal experience, and Will was well aware of it too. So I started praying really hard that he'd stop snoring by the time we got married. Didn't work. I told Will to do positive affirmations, which he kindly told me he'd do, but to be honest I'll have to ask him if he really did them. We looked up the emotions on snoring, and I researched the meridians associated with snoring in Chinese medicine. After three months of ear plugs and experimenting and lots of nights lying awake, what would you say if I told you we have found something that works??
Thyme. Yes, thyme was our unsuspecting answer! You know, the plant you cook with? The herb? We bought the essential oil Thyme almost a month ago, not even realizing it is known to help with snoring. About three weeks ago we read how you can help snoring if you rub it on the bottoms of your feet before going to bed at night, specifically at the base of the big toe, and Will started doing it. After two days there was no change, and he stopped putting it on. Then maybe a week later Will decided to give it another try and started putting it on religiously—he keeps the bottle of thyme on his nightstand, and it's now become part of his bedtime routine. (Really I am just trying to give him things to do before bed since my bedtime routine is like an hour and his is 2 minutes. We regularly discuss this imbalance and the unfairness of life.)
According to a study at the University of North Carolina, 30 percent of women and 40 percent of men snore, although those numbers depend on the person surveyed actually being aware that they snore. This study is to test how making lesions on the soft palate by heating a needle electrode with radio frequency energy can tighten up the soft palate to potentially eliminate snoring. I'm telling you this to illustrate how we as a society are going to great lengths to find ways to get rid of snoring—it disrupts our sleep and the sleep of the people around us.
This Friday Will and I are going on three months being married! We are so in love (I just had to throw that in there) and have so much fun together. Who knew it'd be worth the wait to find a love that would happen so naturally and easily (compared to ALL the other attempts of trying to force love and "make it work") and find the person who would make us truly the happiest? I am so grateful for this man.
Well when we were dating I found out that Will snored. And not just snored but raised the roof with his snores and woke neighboring cities. His friends and family know this from personal experience, and Will was well aware of it too. So I started praying really hard that he'd stop snoring by the time we got married. Didn't work. I told Will to do positive affirmations, which he kindly told me he'd do, but to be honest I'll have to ask him if he really did them. We looked up the emotions on snoring, and I researched the meridians associated with snoring in Chinese medicine. After three months of ear plugs and experimenting and lots of nights lying awake, what would you say if I told you we have found something that works??
Thyme. Yes, thyme was our unsuspecting answer! You know, the plant you cook with? The herb? We bought the essential oil Thyme almost a month ago, not even realizing it is known to help with snoring. About three weeks ago we read how you can help snoring if you rub it on the bottoms of your feet before going to bed at night, specifically at the base of the big toe, and Will started doing it. After two days there was no change, and he stopped putting it on. Then maybe a week later Will decided to give it another try and started putting it on religiously—he keeps the bottle of thyme on his nightstand, and it's now become part of his bedtime routine. (Really I am just trying to give him things to do before bed since my bedtime routine is like an hour and his is 2 minutes. We regularly discuss this imbalance and the unfairness of life.)
After about a week I still didn't notice much of a change in his snoring, BUT the second week I noticed that if he was snoring, all I had to do to get him to stop was gently touch his arm, not even waking him up. This was a huge breakthrough! Before Will started using Thyme if I nudged him he'd stop snoring for 5 seconds, roll over, and start snoring again. On average this second week I would touch his arm to stop his snoring about three times a night.
Now into the third week, I would classify Will as a non-snorer! I know, crazy, huh? If you don't believe me, you are welcome to sleep on the floor beside our bed tonight. This is the truth. The snoring has changed to a very deep breathing that is free of any rattle and does not wake either of us up. Sometimes he will do a few seconds of sounds that would typically turn into a snore, but then they stop. It is magical, really—heavenly! And, to be honest, surprising. I knew essential oils worked great for preventing colds and for helping with my arthritis, but now I know even more so not to limit their possibilities. Who knew thyme was where it was at?
UPDATE: Click here to read the part II to this post.
Friday, March 29, 2013
Massaman Curry
Thanks to Kenny, one of my past authors who first introduced me to the unforgettable Massaman Curry at a small Thai place in American Fork, and even more thanks to Sam, my best friend, for passing on the actual recipe for Massaman Curry to make it for dinner any time we want. We love it!

Massaman Curry
2 tablespoons coconut oil
3 tablespoons red curry paste
1 small piece ginger (approx. 3/4-inch thick), minced
3 tablespoons sucanat brown sugar
3 tablespoons fish sauce
1/3 cup organic peanut butter (or sun butter if you're allergic to nuts)
1/2 cup cubed sweet potatoes (the white ones)
1/2 cup chopped carrots
1/2 cup fresh green beans
1/2 cup chopped broccoli
1/2 cup chopped cauliflower
2 (13.5 ounce) cans coconut milk
3 tablespoons fresh lime juice
Steamed brown rice
Optional:
1. Heat coconut oil in a large saucepan over medium heat. Stir in curry paste and ginger. Cook and stir for 2 minutes.
2. Stir in sucanat, fish sauce, peanut or sun butter, sweet potato, carrots, green beans, and then the coconut milk. Bring to a boil, then reduce heat to medium-low and simmer 10 minutes. Add broccoli and cauliflower, and cook until tender, about 10 more minutes.
3. Add lime juice and cook for an additional 5 minutes before serving. Serve over brown rice.
Just a heads-up: If you make this recipe without the sweet potatoes, make sure you not only replace them with another veggie but add in some other extra veggies. The potatoes absorb some of the sauce, so when you nix the potatoes there's a lot more sauce than usual.
Massaman Curry
2 tablespoons coconut oil
3 tablespoons red curry paste
1 small piece ginger (approx. 3/4-inch thick), minced
3 tablespoons sucanat brown sugar
3 tablespoons fish sauce
1/3 cup organic peanut butter (or sun butter if you're allergic to nuts)
1/2 cup cubed sweet potatoes (the white ones)
1/2 cup chopped carrots
1/2 cup fresh green beans
1/2 cup chopped broccoli
1/2 cup chopped cauliflower
2 (13.5 ounce) cans coconut milk
3 tablespoons fresh lime juice
Steamed brown rice
Optional:
1. Heat coconut oil in a large saucepan over medium heat. Stir in curry paste and ginger. Cook and stir for 2 minutes.
2. Stir in sucanat, fish sauce, peanut or sun butter, sweet potato, carrots, green beans, and then the coconut milk. Bring to a boil, then reduce heat to medium-low and simmer 10 minutes. Add broccoli and cauliflower, and cook until tender, about 10 more minutes.
3. Add lime juice and cook for an additional 5 minutes before serving. Serve over brown rice.
Just a heads-up: If you make this recipe without the sweet potatoes, make sure you not only replace them with another veggie but add in some other extra veggies. The potatoes absorb some of the sauce, so when you nix the potatoes there's a lot more sauce than usual.
Friday, March 22, 2013
Creating Balance in a World of Chaos
I don't know about the rest of you, but I have the hardest time slowing down long enough to eat! And I mean slowing down to make a healthy meal and then calmly eating it. I actually think that's why I married my husband, Will, because his daily priority is eating good food and enjoying it. I do love food, don't get me wrong, but it feels like such a burden to stop what I am doing even if I know it's what's best for me. Feeling okay about pausing to take care of myself comes down to self-love and trusting that I have an abundance of time, which truly is the root of living a balanced life.
And isn't that the ultimate goal, to create balance in our lives? I've been participating in the 21-Day Meditation Challenge by Deepak and Oprah, and in week 1 it helped me reflect on the divinity of my body and, now in week 2, on balance. Monday's centering thought was, "My outer world reflects my inner world," and it was great to take it a step further and think about what is happening right now in my outer world.
(Yes, this is literally a shot of my outer world. I moved to India.)
Clutter was the first thought that came to mind—mental clutter, physical clutter, emotional clutter—anything that I am keeping in my life that no longer serves me. Once we get clear on our future and what we want, it is easier to let go of clutter.
We first have to know what clutter is to be able to let go of it.
Mental clutter could be put-downs or self-criticism, comparing ourselves to others and telling ourselves we're not good enough. Mental clutter could be thoughts that tell us "The world is a scary place," "Money is bad," "You can't trust anyone," or "I never do anything right." A lot of our mental clutter is made up of false beliefs that were engrained in us since we were little, so we've grown up tied to them without even realizing it.
Physical clutter may seem pretty obvious—a garage crammed full of old belongings, a closet spilling over with clothes that don't fit anymore, or an inbox filled with old and unopened emails. But what about physical clutter like unhealthy relationships, a stagnant job, and energy-zapping food? Physical clutter can take on all kinds of forms, but it basically is something tangible we have a hard time letting go of that is not making our lives better.
Little by little as we clear away the mental, physical, and emotional clutter, we start to regain balance. One day, one thought, one emotion at a time.
Usually we know what we need to do to declutter our lives, but it's draining and slow going or we're inconsistent. Being inconsistent is my biggest struggle! The "not doing what I should be doing" reignites the mental clutter, telling myself, "Katie, stop being dumb. Just do it! It's your own fault you feel overwhelmed now and have a blaring headache." Not very nice, right?
I've found that if I do my "5 Pillars" every morning my day goes much smoother, I'm nicer to myself, and I feel much more at peace about the chaos around me. Even though I am sometimes inconsistent, I know that if I do my 5 Pillars I am laying a solid foundation for my day. You may have a variation on these 5 Pillars, so do what works for you. If you haven't created foundational pillars for your day, I strongly suggest that you do—it increases the inner peace you feel and re-instills clarity to know what you want your life to look like.
My 5 Pillars
1. Green Smoothie: vitamins and oxygen to cells, energy, nourishment
2. Meditation: clarity, calmness, relaxation, perspective, peace, enlightenment
3. Prayer & Emotional Releasing: reconnection with God, peace, purpose, gratitude, help, releasing of emotions I no longer need and giving them over to him
4. Uplifting Reading: motivation, spiritual perspective, vision, grounding, focus, nourishment, peace, answers
5. Exercise in Nature: self-love, connection, peace, calm, adrenaline, energy, flexibility, wisdom
If you notice a trend in this list, seems like our lives attain balance when daily we do things that bring us peace. When we consider that 90% of all disease is caused or complicated by stress, it makes sense why these 5 Pillars help me feel so balanced. Guess I better stop all this blogging and go do yoga before the day's over!
And isn't that the ultimate goal, to create balance in our lives? I've been participating in the 21-Day Meditation Challenge by Deepak and Oprah, and in week 1 it helped me reflect on the divinity of my body and, now in week 2, on balance. Monday's centering thought was, "My outer world reflects my inner world," and it was great to take it a step further and think about what is happening right now in my outer world.
(Yes, this is literally a shot of my outer world. I moved to India.)
Clutter was the first thought that came to mind—mental clutter, physical clutter, emotional clutter—anything that I am keeping in my life that no longer serves me. Once we get clear on our future and what we want, it is easier to let go of clutter.
We first have to know what clutter is to be able to let go of it.
Mental clutter could be put-downs or self-criticism, comparing ourselves to others and telling ourselves we're not good enough. Mental clutter could be thoughts that tell us "The world is a scary place," "Money is bad," "You can't trust anyone," or "I never do anything right." A lot of our mental clutter is made up of false beliefs that were engrained in us since we were little, so we've grown up tied to them without even realizing it.
Physical clutter may seem pretty obvious—a garage crammed full of old belongings, a closet spilling over with clothes that don't fit anymore, or an inbox filled with old and unopened emails. But what about physical clutter like unhealthy relationships, a stagnant job, and energy-zapping food? Physical clutter can take on all kinds of forms, but it basically is something tangible we have a hard time letting go of that is not making our lives better.
- orangeacid / Foter.com / CC BY
Little by little as we clear away the mental, physical, and emotional clutter, we start to regain balance. One day, one thought, one emotion at a time.
Usually we know what we need to do to declutter our lives, but it's draining and slow going or we're inconsistent. Being inconsistent is my biggest struggle! The "not doing what I should be doing" reignites the mental clutter, telling myself, "Katie, stop being dumb. Just do it! It's your own fault you feel overwhelmed now and have a blaring headache." Not very nice, right?
I've found that if I do my "5 Pillars" every morning my day goes much smoother, I'm nicer to myself, and I feel much more at peace about the chaos around me. Even though I am sometimes inconsistent, I know that if I do my 5 Pillars I am laying a solid foundation for my day. You may have a variation on these 5 Pillars, so do what works for you. If you haven't created foundational pillars for your day, I strongly suggest that you do—it increases the inner peace you feel and re-instills clarity to know what you want your life to look like.
My 5 Pillars
1. Green Smoothie: vitamins and oxygen to cells, energy, nourishment
2. Meditation: clarity, calmness, relaxation, perspective, peace, enlightenment
3. Prayer & Emotional Releasing: reconnection with God, peace, purpose, gratitude, help, releasing of emotions I no longer need and giving them over to him
4. Uplifting Reading: motivation, spiritual perspective, vision, grounding, focus, nourishment, peace, answers
5. Exercise in Nature: self-love, connection, peace, calm, adrenaline, energy, flexibility, wisdom
If you notice a trend in this list, seems like our lives attain balance when daily we do things that bring us peace. When we consider that 90% of all disease is caused or complicated by stress, it makes sense why these 5 Pillars help me feel so balanced. Guess I better stop all this blogging and go do yoga before the day's over!
Thursday, March 21, 2013
La arepa...both exotic and gluten-free
I was first introduced to the arepa 11 years ago when I moved to Venezuela. I lived there for a year, and from the time I arrived to the time I left I went from eating 1 of these bad boys a day to eating up to 3 or 4! It's an understatement to say I fell in love.
In the last few years I started making arepas a lot more frequently. When I became allergic to gluten 2 1/2 years ago, the arepa became an easy and safe go-to since it's made from corn flour. And my food-connoisseur of a husband has declared the arepa tasty enough to eat on a weekly basis, so after being married only 2 months I'd say we've had arepas 4 or 5 times for either lunch or dinner.
Where can you buy arepa mix? A local Latin market or even your local grocery store. I was pleasantly surprised to find some at Target!
What ingredients do you need to make an arepa?
2 1/2 cups filtered water
1 teaspoon sea salt
2 cups harina P.A.N. arepa mix
1 tablespoon coconut oil or olive oil
What do you put inside an arepa?
Tuna mixture: tuna w/ chopped onions, tomatoes, and cilantro w/ a little garlic salt, mayo, and lettuce, spinach, or beet greens.
Tuna mixture: tuna w/ chopped kale and purple cabbage w/ a little garlic salt and mayo.
Replace mayo with veganaise, guacamole, or smashed plain avocado.
Organic nut butter and raw honey.
Other sandwich condiments of your choosing—some people love butter and cheese, others love a good ole turkey arepa w/ lettuce, tomato, and pickles.
How do you make an arepa?
1. Pour water into a bowl and add salt.
2. Pour arepa mix into water and squish and knead together with your hand. (The water soaks in fairly quickly, so it's better to have the dough more wet than dry.)
3. Separate dough and form into 4 balls.
4. Then one at a time gently flatten the balls into your hand to form a patty, similar to forming a hamburger patty.
5. Warm some coconut oil or olive oil in a frying pan on medium heat.
5. Gently place the patties into the frying pan. Flip when golden brown.
6. Remove from heat when both sides are golden and let cool for a few minutes.
7. Using a knife, slice the arepa in half, forming a pocket. Sometimes the arepa separates completely, pulling apart and making it hard to keep it as a pocket, which is fine—it'll be more like a hamburger bun then with a top and a bottom. The dough on the inside of the arepa will be soft and sticky, so just in case you think it's not totally cooked, it is.
8. Add your choice of fillers.
I will always be grateful to Venezuela for introducing me to the deliciously wide-open world of arepas! Let me know what other great combinations you discover to put in your arepa.

In the last few years I started making arepas a lot more frequently. When I became allergic to gluten 2 1/2 years ago, the arepa became an easy and safe go-to since it's made from corn flour. And my food-connoisseur of a husband has declared the arepa tasty enough to eat on a weekly basis, so after being married only 2 months I'd say we've had arepas 4 or 5 times for either lunch or dinner.
Where can you buy arepa mix? A local Latin market or even your local grocery store. I was pleasantly surprised to find some at Target!
What ingredients do you need to make an arepa?
2 1/2 cups filtered water
1 teaspoon sea salt
2 cups harina P.A.N. arepa mix
1 tablespoon coconut oil or olive oil
What do you put inside an arepa?
Tuna mixture: tuna w/ chopped onions, tomatoes, and cilantro w/ a little garlic salt, mayo, and lettuce, spinach, or beet greens.
Tuna mixture: tuna w/ chopped kale and purple cabbage w/ a little garlic salt and mayo.
Replace mayo with veganaise, guacamole, or smashed plain avocado.
Organic nut butter and raw honey.
Other sandwich condiments of your choosing—some people love butter and cheese, others love a good ole turkey arepa w/ lettuce, tomato, and pickles.
How do you make an arepa?
1. Pour water into a bowl and add salt.
2. Pour arepa mix into water and squish and knead together with your hand. (The water soaks in fairly quickly, so it's better to have the dough more wet than dry.)
3. Separate dough and form into 4 balls.
4. Then one at a time gently flatten the balls into your hand to form a patty, similar to forming a hamburger patty.
5. Warm some coconut oil or olive oil in a frying pan on medium heat.
5. Gently place the patties into the frying pan. Flip when golden brown.
6. Remove from heat when both sides are golden and let cool for a few minutes.
7. Using a knife, slice the arepa in half, forming a pocket. Sometimes the arepa separates completely, pulling apart and making it hard to keep it as a pocket, which is fine—it'll be more like a hamburger bun then with a top and a bottom. The dough on the inside of the arepa will be soft and sticky, so just in case you think it's not totally cooked, it is.
8. Add your choice of fillers.
I will always be grateful to Venezuela for introducing me to the deliciously wide-open world of arepas! Let me know what other great combinations you discover to put in your arepa.

Wednesday, March 20, 2013
Energy Balls for a Sweet Healthy Snack
A fast, easy snack that is packed full of healthy goodness. A no-bake cookie sprinkled with ground flax seed, packed together with nut butter (or sun butter in our case, for Will's nut allergy), and sweetened with raw honey and carob chips. This is definitely our top go-to sweet source of enjoyment, with the recipe sticky-noted on our cupboard.
1 cup dry oats (gluten-free for those of you who choose)
2/3 cup coconut flakes
1/2 cup nut butter (I love organic almond butter, but sun butter works great for nut allergies, as it's made with sunflower seeds)
1/2 cup ground flaxseed (We grind our flax seed in our Blendtec.)
1/3 cup raw honey or maple syrup (The last few times I've used all-natural syrup and it's really good too!)
1/3 cup carob chips (or dried fruit if you prefer)
1 teaspoon vanilla extract
Place all ingredients in a large bowl and stir it all together. It's a pretty good bicep workout, so plan ahead and on the day you make these maybe don't work out your right arm when you go to the gym. Chill in the refrigerator for about 20 minutes and then roll into balls. If the balls don't stick together very well, next time add a little less oats or a little more nut butter or honey. We roll ours into balls that are about 1-inch in diameter, which makes about 20 energy balls.
1 cup dry oats (gluten-free for those of you who choose)
2/3 cup coconut flakes
1/2 cup nut butter (I love organic almond butter, but sun butter works great for nut allergies, as it's made with sunflower seeds)
1/2 cup ground flaxseed (We grind our flax seed in our Blendtec.)
1/3 cup raw honey or maple syrup (The last few times I've used all-natural syrup and it's really good too!)
1/3 cup carob chips (or dried fruit if you prefer)
1 teaspoon vanilla extract
Place all ingredients in a large bowl and stir it all together. It's a pretty good bicep workout, so plan ahead and on the day you make these maybe don't work out your right arm when you go to the gym. Chill in the refrigerator for about 20 minutes and then roll into balls. If the balls don't stick together very well, next time add a little less oats or a little more nut butter or honey. We roll ours into balls that are about 1-inch in diameter, which makes about 20 energy balls.
Wednesday, January 30, 2013
Recipes Worth the Wait: Banana Oatmeal Smoothie and Roasted Veggie Burritos
It's been so long, where do I begin? Maybe with a recipe or two? That's easy enough and will quickly bring you into my new married life where I am feeding two instead of just one. Here are two of the hits so far:
Banana Oatmeal Smoothie
serves 2
1/4 cup nondairy milk (We've been using coconut milk.)
1/3 cup Greek yogurt (preferably honey flavored)
2 bananas
1/2 cup cooked oatmeal
Dash of cinnamon and cardamom—we love cardamom!
2 cups ice cubes
Add ingredients to blender in the order listed. Use a turbo blender if you have one, as the ice can be hard on a standard blender. Enjoy!
Roasted Vegetable and Black Bean Burritos
serves 12
I found this recipe (with slight changes) on tasty kitchen.com, and we loved it. The only thing is it ended up making enough for about 18 rather than 6. My guess is that our tortillas were smaller than what the original creator used and maybe my red onion and sweet potatoes were larger. Who knows, but I'm just warning you that you may end up with enough food to feed the neighborhood. I also changed the cooking times since the sweet potatoes were still crunchy for us.
2 orange sweet potatoes, diced
1 jalapeño, diced
1 red bell pepper, diced
1 red onion, diced
1 tablespoon olive oil
1 teaspoon cumin
1 teaspoon chili powder
Salt and pepper to taste
1 15-ounce can black beans, rinsed (or 2 cups black beans, soaked and cooked)
1/2 cup fresh cilantro, chopped
2 teaspoons fresh lime juice
2 cups shredded organic cheddar (optional)
2 packages Rudi's gluten-free tortillas or corn tortillas (or whole wheat tortillas if you eat gluten)
Extra olive oil or coconut oil for greasing
Aluminum foil, torn into individual pieces to wrap around each burrito
Preheat oven to 425 degrees. Place all chopped veggies in a 9 x 13 baking dish. In a small bowl combine spices and mix. Then sprinkle over veggies and stir to evenly distribute. Bake for 25 minutes, stirring half way through.
Add black beans, cilantro, and lime to veggies and stir. At this point you can store mixture in the refrigerator if you want to make the burritos later.
Lower oven heat to 375 degrees. Warm tortillas in a skillet or griddle, and place two large spoonfuls of veggies in each tortilla. Top with a handful of cheese. Wrap the tortilla burrito style so that all the goodies stay inside. Make sure not to add too many veggies or the tortilla won't stay closed. (If you're using corn tortillas, you'll probably only be able to fit one spoonful of veggies in the tortilla and will need to eat it taco style.) Place burritos seam side down on individual pieces of aluminum foil and wrap around burrito. Consider rubbing the foil with olive oil or coconut oil to keep the tortilla from sticking. Place burritos in a clean 9 x 13 pan or other baking dish, and bake for 20 minutes.
This recipe is great because you can wrap all the burritos, baking the ones you're going to eat right then and refrigerating the others you want to save for later.
Banana Oatmeal Smoothie
serves 2
1/4 cup nondairy milk (We've been using coconut milk.)
1/3 cup Greek yogurt (preferably honey flavored)
2 bananas
1/2 cup cooked oatmeal
Dash of cinnamon and cardamom—we love cardamom!
2 cups ice cubes
Add ingredients to blender in the order listed. Use a turbo blender if you have one, as the ice can be hard on a standard blender. Enjoy!
Roasted Vegetable and Black Bean Burritos
serves 12
I found this recipe (with slight changes) on tasty kitchen.com, and we loved it. The only thing is it ended up making enough for about 18 rather than 6. My guess is that our tortillas were smaller than what the original creator used and maybe my red onion and sweet potatoes were larger. Who knows, but I'm just warning you that you may end up with enough food to feed the neighborhood. I also changed the cooking times since the sweet potatoes were still crunchy for us.
2 orange sweet potatoes, diced
1 jalapeño, diced
1 red bell pepper, diced
1 red onion, diced
1 tablespoon olive oil
1 teaspoon cumin
1 teaspoon chili powder
Salt and pepper to taste
1 15-ounce can black beans, rinsed (or 2 cups black beans, soaked and cooked)
1/2 cup fresh cilantro, chopped
2 teaspoons fresh lime juice
2 cups shredded organic cheddar (optional)
2 packages Rudi's gluten-free tortillas or corn tortillas (or whole wheat tortillas if you eat gluten)
Extra olive oil or coconut oil for greasing
Aluminum foil, torn into individual pieces to wrap around each burrito
Preheat oven to 425 degrees. Place all chopped veggies in a 9 x 13 baking dish. In a small bowl combine spices and mix. Then sprinkle over veggies and stir to evenly distribute. Bake for 25 minutes, stirring half way through.
Add black beans, cilantro, and lime to veggies and stir. At this point you can store mixture in the refrigerator if you want to make the burritos later.
Lower oven heat to 375 degrees. Warm tortillas in a skillet or griddle, and place two large spoonfuls of veggies in each tortilla. Top with a handful of cheese. Wrap the tortilla burrito style so that all the goodies stay inside. Make sure not to add too many veggies or the tortilla won't stay closed. (If you're using corn tortillas, you'll probably only be able to fit one spoonful of veggies in the tortilla and will need to eat it taco style.) Place burritos seam side down on individual pieces of aluminum foil and wrap around burrito. Consider rubbing the foil with olive oil or coconut oil to keep the tortilla from sticking. Place burritos in a clean 9 x 13 pan or other baking dish, and bake for 20 minutes.
This recipe is great because you can wrap all the burritos, baking the ones you're going to eat right then and refrigerating the others you want to save for later.
Monday, November 5, 2012
Hot Pink & Black Bridal Shower
You may have noticed that I haven't posted since September (and even then it was sparse), but I have a really good excuse. I got engaged!!! It's been a whirlwind since the beginning of September—a joyful, happy pixie dust of a whirlwind mixed with a handful of stressful moments, like sand in the eyes. You really can't avoid that, but at least I am getting married to the man of my dreams. Knowing that makes everything better.
Four of my dear friends threw me a shower on Saturday, and since they know me so well they kept the menu as gluten-free and vegan as possible. Aren't they great? Here's a picture of the beautiful array of foods.
Hot Pink Smoothie, fruit, nuts, hummus & veggies, gluten-free & vegan muffins (which I will soon get a recipe from Lori—it might've been a mix, but it tasted divine), water with orange slices, banana bread, and apples & peanut butter.
Four of my dear friends threw me a shower on Saturday, and since they know me so well they kept the menu as gluten-free and vegan as possible. Aren't they great? Here's a picture of the beautiful array of foods.
Hot Pink Smoothie, fruit, nuts, hummus & veggies, gluten-free & vegan muffins (which I will soon get a recipe from Lori—it might've been a mix, but it tasted divine), water with orange slices, banana bread, and apples & peanut butter.
Tuesday, September 18, 2012
Quinoa and Black Bean Salad
1 tsp Olive oil
1 onion, chopped
3 cloves Garlic, peeled and chopped
3/4 cup uncooked Quinoa
1 1/2 cups Vegetable broth
1 tsp ground Cumin
1/4 tsp Cayenne pepper
Salt and Pepper to taste
1 cup frozen Corn kernels
2 (15 oz) cans Black beans, rinsed and drained (would be healthier to make your own)
1/2 cup chopped fresh Cilantro
1. Heat the oil in a medium saucepan over medium heat. Stir in the onion and garlic, and saute until lightly browned.
2. Mix quinoa into the saucepan and cover with vegetable broth. Season with cumin, cayenne pepper, salt, and pepper. Bring the mixture to a boil. Cover, reduce heat, and simmer 20 minutes.
3. Stir frozen corn into the saucepan, and continue to simmer about 5 minutes until heated thoroughly.
4. Mix in the black beans and cilantro.
Enjoy!
Monday, September 10, 2012
Roasted Summer Squash
This recipe is easy, relatively fast (fast prep, semi-fast bake time), and delicious. Can't beat that. Oh, and it's healthy.
Yellow squash
Cloves garlic, chopped
Thyme
Rosemary
Red pepper flakes
Salt and fresh ground pepper
Coconut oil or olive oil
1. Preheat the oven to 400F. Cut the squash lengthwise. Scoop out the seeds to create a small cavity in the center.
2. Lightly grease a baking dish or pan with coconut oil and place squash on top.
3. Into each squash half, put a little of each of the seasonings to taste—it's all up to your tastebuds. I sprinkle on a little of everything, but the red pepper flakes sparingly.
4. Drizzle oil or spread a little coconut oil over top. Cover with foil. Bake for 25 minutes and then remove the foil. Then bake at 300F for another 10 minutes, or until soft.
I promise this will be one of those go-to recipes that you crave—the seasonings really make the squash come to life. This recipe was inspired by The 28-Day Cleansing Program cookbook.
Yellow squash
Cloves garlic, chopped
Thyme
Rosemary
Red pepper flakes
Salt and fresh ground pepper
Coconut oil or olive oil
1. Preheat the oven to 400F. Cut the squash lengthwise. Scoop out the seeds to create a small cavity in the center.
2. Lightly grease a baking dish or pan with coconut oil and place squash on top.
3. Into each squash half, put a little of each of the seasonings to taste—it's all up to your tastebuds. I sprinkle on a little of everything, but the red pepper flakes sparingly.
4. Drizzle oil or spread a little coconut oil over top. Cover with foil. Bake for 25 minutes and then remove the foil. Then bake at 300F for another 10 minutes, or until soft.
I promise this will be one of those go-to recipes that you crave—the seasonings really make the squash come to life. This recipe was inspired by The 28-Day Cleansing Program cookbook.
Thursday, September 6, 2012
Carrot Fries
This past week my mom and I flew to Washington to visit my adorable niece and nephews and equally adorable brother and sister-in-law. We tried a lot of new recipes, and among them was this yummy treat . . . carrot fries! Yes, you will want to keep eating them and maybe even growl like my baby nephew when your bowl is empty.
1. Preheat oven to 450 degrees.
2. Peel carrots and chop into thick shoestrings.
3. Drizzle lightly with olive oil or coconut oil, sprinkle with salt and pepper, and toss to coat (or use your hands).
4. Cover a baking sheet with aluminum foil and spread carrots out in a single layer.
5. Roast for 25 to 30 minutes, or until slightly brown.
Enjoy!
1. Preheat oven to 450 degrees.
2. Peel carrots and chop into thick shoestrings.
3. Drizzle lightly with olive oil or coconut oil, sprinkle with salt and pepper, and toss to coat (or use your hands).
4. Cover a baking sheet with aluminum foil and spread carrots out in a single layer.
5. Roast for 25 to 30 minutes, or until slightly brown.
Enjoy!
Wednesday, August 29, 2012
Chocolate Chia Pudding
I subscribe to Veg News magazine (thanks to my thoughtful friend Karina!) and have had the Chocolate Chia Pudding recipe dog-eared since June. Last night I finally made it, specially for my boyfriend who loves chocolate pudding, and it was a huge hit! He said it reminds him of tapioca pudding.
Serves 6
3 cups non-diary chocolate milk (I used rice milk.)
1/2 cup chia seeds (If you buy them on a Tuesday from Whole Foods you get 15% off!)
1 teaspoon vanilla
1/4 teaspoon cinnamon (This is optional, but it sure makes this pudding taste amazing!)
2 tablespoons agave
fresh raspberries, for garnish
1. In a medium-sized bowl stir together non-dairy milk, chia seeds, and vanilla. Chill in the fridge for 1 hour. Remove bowl and stir in agave.
2. Return bowl to the fridge and chill for another 2 to 3 hours. (When I first tasted the pudding after it chilled for only an hour, the texture of the chia seeds wasn't too appetizing to me. But the longer the chia seeds soaked in the fridge, the more they swelled and resembled tapioca.)
Serves 6
3 cups non-diary chocolate milk (I used rice milk.)
1/2 cup chia seeds (If you buy them on a Tuesday from Whole Foods you get 15% off!)
1 teaspoon vanilla
1/4 teaspoon cinnamon (This is optional, but it sure makes this pudding taste amazing!)
2 tablespoons agave
fresh raspberries, for garnish
1. In a medium-sized bowl stir together non-dairy milk, chia seeds, and vanilla. Chill in the fridge for 1 hour. Remove bowl and stir in agave.
2. Return bowl to the fridge and chill for another 2 to 3 hours. (When I first tasted the pudding after it chilled for only an hour, the texture of the chia seeds wasn't too appetizing to me. But the longer the chia seeds soaked in the fridge, the more they swelled and resembled tapioca.)
Saturday, July 28, 2012
Create. More. Love.
Just getting ready for a bridal shower and let my creative juices flow. I'm a total gift bag/shopping bag recycler, so I pulled out a LOFT bag and started cutting up a scratch sheet of some of my watercolor art to cover up the store name (the other side of the bag has an orange watercolor starfish happily covering up LOFT). Then when I turned the bag over I decided to paint a V and an E to spell out LOVE! What bride wouldn't love this? I love to create! To be honest I was in a super annoyed/angry/crappy mood until I let myself explore some ideas and create, and now I'm feeling sooo much better.
Life Lesson: Love can come of any situation, any combination, if we let go and let our heart lead the way. And taking time to be creative can totally shift and lighten your mood!
Tuesday, July 17, 2012
Sprouted Lentil Wrap Mix Recipe
Soak overnight:
2 cups Lentils
1 cup Sunflower seeds
1 cup Almonds
1/2 cup Sesame seeds
Drain in the morning and allow to sprout 24 hours, rinsing occasionally. Process in a food processor to be a coarse mash and add:
Handful of chopped cilantro, basil, or parsley
1 Bell Pepper, chopped
1 Onion, diced
1/4 cup Lemon juice
2 Tbsp. Extra-virgin Olive oil
2 tsp. Sea salt
1 Anaheim pepper, diced (optional)
2 Tbsp. Flax oil (optional)
Use as a filling in cabbage, lettuce leaves, or sprouted-wheat tortillas. (I put slices of avocado on top and it was delicious.)
*This recipe makes a lot, you can freeze leftovers or cut the recipe in half.
2 cups Lentils
1 cup Sunflower seeds
1 cup Almonds
1/2 cup Sesame seeds
Drain in the morning and allow to sprout 24 hours, rinsing occasionally. Process in a food processor to be a coarse mash and add:
Handful of chopped cilantro, basil, or parsley
1 Bell Pepper, chopped
1 Onion, diced
1/4 cup Lemon juice
2 Tbsp. Extra-virgin Olive oil
2 tsp. Sea salt
1 Anaheim pepper, diced (optional)
2 Tbsp. Flax oil (optional)
Use as a filling in cabbage, lettuce leaves, or sprouted-wheat tortillas. (I put slices of avocado on top and it was delicious.)
*This recipe makes a lot, you can freeze leftovers or cut the recipe in half.
Subscribe to:
Posts (Atom)